Easy Watercolor Beach Painting for Beginners
This simple watercolor beach painting is perfect if you want to create a soft ocean scene without needing advanced painting skills.
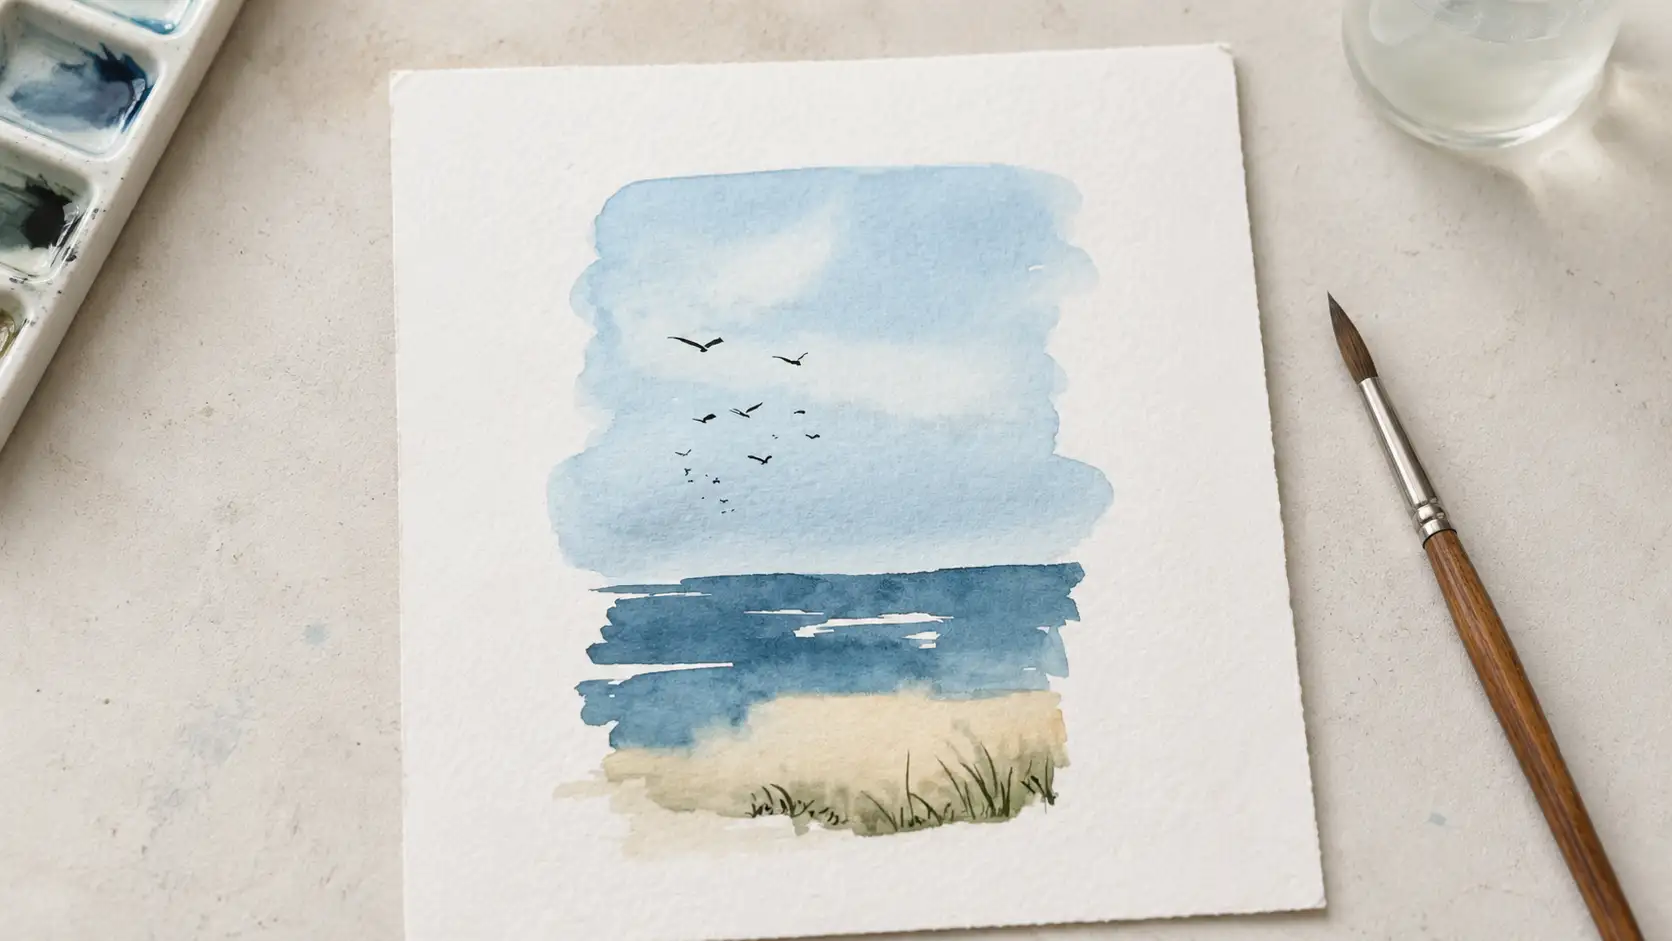
The design is small, calm, and minimal: a pale blue sky, a darker ocean layer, soft sandy beach, tiny birds, and a few grass details at the bottom. It looks peaceful, aesthetic, and handmade the kind of watercolor art people love saving on Pinterest.
This tutorial is inspired by the viral mini watercolor painting style, where the whole scene is created with just a few loose brushstrokes.
What You Need
To make this easy watercolor beach painting, you will need:
- Watercolor paper
- Watercolor paints
- A small round brush
- A larger brush for washes
- Clean water
- Paper towel
- Masking tape, optional
- Pencil, optional
For colors, you only need a few simple shades:
- Light blue for the sky
- Darker blue for the sea
- Beige or light brown for the sand
- Dark gray or black for the birds
- Green or brown for the small grass details
You do not need expensive materials. This painting works because it is simple and soft.
Step 1: Prepare the Paper
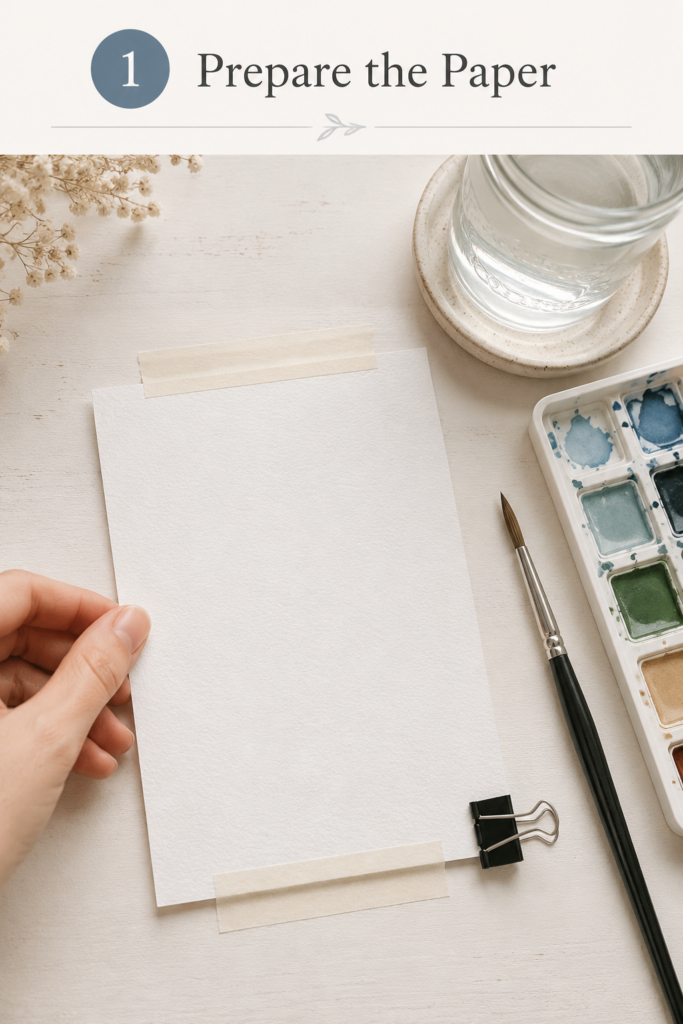
Place your watercolor paper on a flat surface.
If you want clean edges, tape the paper down with masking tape. This also helps the paper stay flatter while painting.
You can lightly mark where the sky, ocean, and sand will be, but keep the sketch very simple. This painting does not need a detailed drawing.
Think of the scene in three parts:
Sky at the top
Ocean in the middle
Sand at the bottom
Step 2: Paint the Soft Blue Sky

Start with a very light blue watercolor mix.
Wet the top area of the paper with clean water, then softly add the blue paint. Let the color spread naturally. Do not try to make the sky perfect.
Keep the edges soft and uneven. This is what gives the painting that dreamy watercolor look.
Leave some white space if you want the sky to feel light and airy.
Let the sky dry slightly before adding the next layer.
Step 3: Add the Ocean Layer

Now mix a darker blue color.
Paint a horizontal ocean shape under the sky. The top of the sea can be soft, but the lower part can be darker and more defined.
Do not cover the whole page. The beauty of this style is that the painting looks loose and minimal.
Add a few small white gaps or lighter lines to suggest waves and reflections.
If the blue feels too strong, gently lift some color with a clean damp brush or paper towel.
Step 4: Paint the Sandy Beach
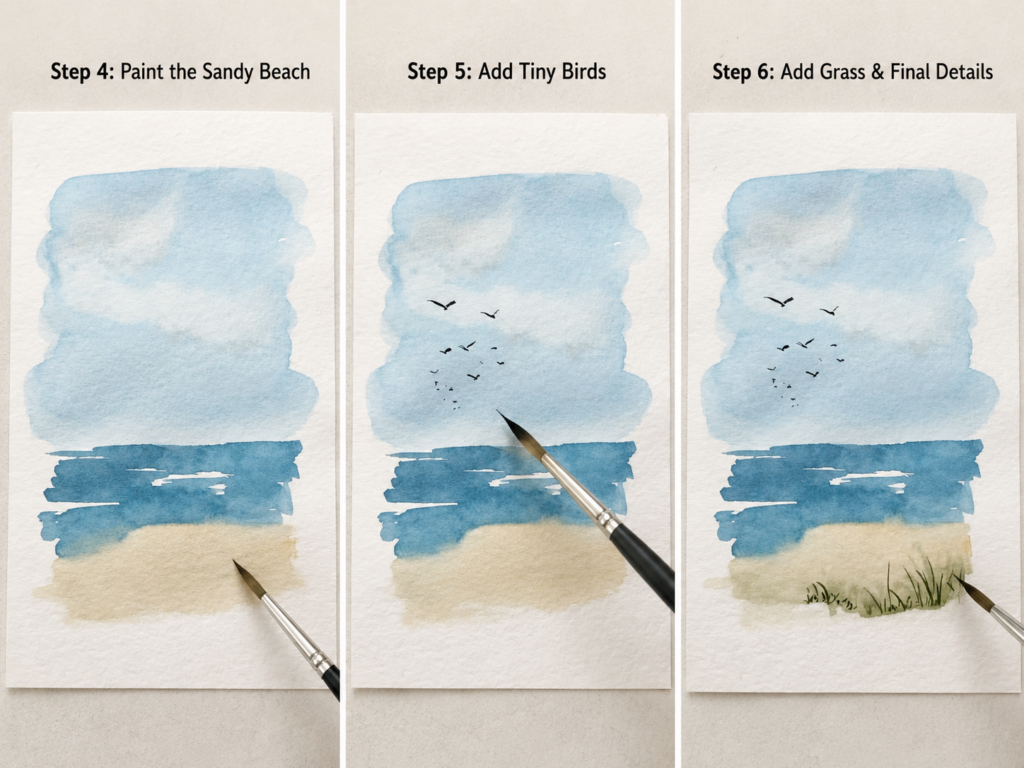
Under the ocean, add a soft beige or light brown wash for the sand.
Keep this area lighter than the sea. The sand should feel warm and simple, not too detailed.
Blend the sand slightly into the lower edge of the water so the scene feels natural.
You can add a tiny bit of darker beige near the bottom for depth, but do not overwork it.
Step 5: Add Tiny Birds
Wait until the sky is dry before painting the birds.
Use a very small brush and dark gray or black paint. Paint each bird with a tiny curved “V” shape.
Make some birds smaller and some slightly bigger. This creates distance and makes the sky look more alive.
Do not add too many birds. A small group of birds is enough.
Step 6: Add Grass and Final Details
At the bottom of the painting, add a few small grass strokes using green, brown, or dark beige.
Keep the lines thin and loose. They should look natural, not perfect.
You can also add a few tiny marks near the sand to create texture.
Let the painting dry completely. If you used tape, remove it slowly to reveal clean edges.
Tips for a Better Result
Use more water for the sky so it stays soft.
Use less water for birds and grass so the details stay sharp.
Do not overpaint the scene. Simple is better.
Let each layer dry before adding small details.
Keep the birds tiny and minimal.
Use light colors first, then darker details at the end.
Common Mistakes to Avoid
Do not make the sky too dark. The sky should stay soft and pale.
Do not paint the birds while the paper is still wet. They will spread and lose their shape.
Do not add too many grass strokes. A few small details are enough.
Do not try to make the ocean perfectly straight. A natural handmade look is better.
Do not use too much paint on the first layer. Watercolor looks best when built slowly.
Is This Watercolor Painting Good for Beginners?
Yes, this is a great beginner watercolor project.
It does not require drawing skills, realistic shading, or complicated details. You only need to practice soft washes, simple layering, and tiny brush details.
This is also a good project if you want to make small handmade cards, journal art, wall prints, or Pinterest-style painting videos.
Final Thoughts
This easy watercolor beach painting is simple, relaxing, and beautiful. With only a few colors and basic brushstrokes, you can create a peaceful ocean scene with sky, water, sand, birds, and grass.
The secret is to keep everything soft and minimal. Let the watercolor move naturally, add the darker details only at the end, and avoid making the painting too busy.
If you are new to watercolor, this is one of the easiest aesthetic paintings to try.
FAQ
What is this painting style called?
It is a loose watercolor seascape or mini watercolor beach painting.
Can beginners make this?
Yes. This is beginner-friendly because it uses simple shapes and soft washes.
What colors do I need?
You mainly need light blue, dark blue, beige, green or brown, and black or dark gray.
Do I need to draw first?
No. You can paint this directly without drawing, but a very light pencil guide can help.
How do I paint the birds?
Use a tiny brush and paint small curved “V” shapes after the sky is dry.
Can I make this on canvas?
Watercolor works best on watercolor paper. Canvas is not ideal unless it is specially prepared for watercolor.
Can I sell this as a print?
Yes, if you create your own original version and use your own photos or video.